27 July 2010

Update on the Butterick 9265 Dress

 Ok, so two days before the wedding deadline, I brought out from my wardrobe a lovely homemade vintage 70s empire line dress in a cream and decided it needed an airing and the wedding would be perfect.  Last time I had worn was a year and a week before for a garden party.  I was around 35 weeks pregnant and had to deeply breath in to get the back zip done up but I was determined to wear it! It flowed over the bump beautifully anyway.

The following weekend, at another wedding I wore a modern 40s/50s look dress in a black lined cotton with purple, blue and white flowers.  I wouldn't normally wear black to a wedding but this dress just seemed to be right so I teamed it with purple tights and black shoes. When I got to the wedding I discovered it was themed with the same shade of purple! I shall add photos this week.

Any way, what has this got to do with the Butterick dress?  Well I supposed to be wearing it to the first wedding and, since I changed my mind, I didn't get on with finishing it.  To be honest I've made so many changes I've lost my impetus somewhat but I must must finish it.  My new deadline is 22nd August for Mango's first birthday!


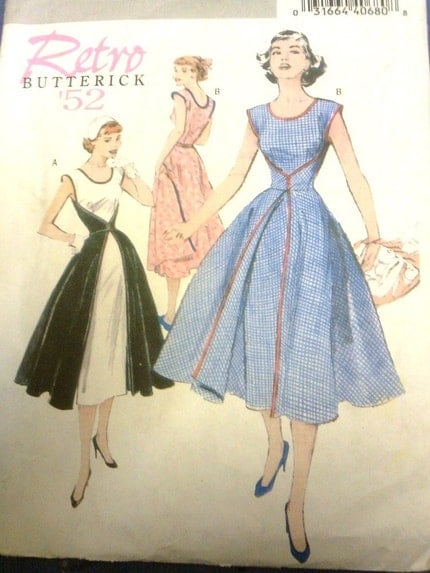
The most adjusted bit is the bodice, here is the pattern view bodice:

Could I get it to look pretty like that?! The neckline came up too high and there just felt like there was too much fabric across my bust.


So I ended up reducing it pretty much to a deep V surplice although with enough fabric to preserve modesty! The tuck darts look pretty cute in the muslin too.
 

But I was still contemplating converting them to gathers to make like easier, I'd seen it on a few other patterns of the time and more modern.  These were my alternative inspiration pics for the surplice:


Then when I was fitting my lining before I cut out the outer dress layers I stumbled across a new alternative.  I tried on the lining inside to get a matt finish to  mimic the dress crepe and the neck flopped back into a satiny rever collar, "oooh pretty" I thought!  So here it is in its new design in lining and then with the actual crepe outer dress layer in place.  You can see I was toying with doing the midriff in the satin side too but decided it was overload.  The revers are interfaced now to give them structure and support as is the midriff because I wanted a super smooth stomach line to mimic the corsetted look.


It all needs sewing together now, its so close, just got to find my sewing mojo and get on with it.  The matching petticoat is also in mid-production, I wanted to try gathering the layers with my ruffling foot but that's proving to require so much thought and input it would probably be quicker to hand gather!  Since I intend to make more petticoats, I think its worth taking the time now to learn how to do the machine way and make the process quicker in future. That's the logic anyway haha.

Outside In


Before the dry, hot weather hit the garden was alive with multicolour borders stuffed with flowers.  Not getting outside as much as I would like, I decided to bring some of the garden inside to adorn our basement stairs. I could look at garden flowers all day (even through the hayfever sneezes!).


25 July 2010

Feeling ruffled...

A little while ago I treated myself to a ruffler foot, a foot that while not necessary promises of neat pleats and instants gathers...  It reminds me of The Cleaners, that weird contraption in Labyrinth that pursues Sarah and Hoggle throught he Oubliette.  Terrifying  at first look but actually fairly simple and not so menacing mechanics when you get to examine it.  And armed with internet video tutorials and raving reviews about how you'll be merrily ruffling away in no time I finally took my ruffler out of its box and attached it to my machine, full of hopes and expectations... Cue an hour of blue air, effing, blinding, pinging, low-flying needles, yards of tangled thread and some pretty horrific sounding clunking, grinding and growling from my poor machine!

The instructions that came with my foot appear to have been written for someone else's! It has a fairly detailed description of all the parts and a diagram but sadly the two are not linked so its guesswork as to which part of the foot each description relates.  I am still looking for the part that has numbers 0 to 8 inscribed on it... Information on the net is pretty scarce but the videos helped.

They are a little fiddly to get on and at first I wasn't sure it was correctly connected on the needle clamp bar but it couldn't possibly fit any other way (mine is a universal foot sold by a Brother dealer so theoretically it should fit).  I duly noted CarlaC's tip in the video linked above to have the needle threaded before attaching the foot because it gets fiddly. This proved to be futile when the first thing that happened on starting to sew was the thread breaking and coming out of the needle eye!  This happened several times but it wasn't any hassle to rethread.  I had no problems feeding the fabric between the plates and through the guide either.

I also adhered to the screwdriver tip and was awed by the way the foot throws itself around and several times had to be retightened because it had become wobbly.  I think that accounted for some of the horrendous noise it made and I should have realised indicated to a major mistake I had made... oh hindsight!

Following that I smashed two needles - I still haven't found one which went flying off into air - I quickly donned safety specs!  This was not caused by the needle hitting the foot in the operational position, which apparently could be a problem.  Maybe what smashed the needles was the foot wobbling out of position? The needle would go down into the fabric then get stuck, impossible to wind on by hand but could be budged by using the foot pedal. Then the needle would fall out of its clamp.  Whatever was going on I wasn't getting anywhere never mind gorgeous ruffles spilling out of the back if my machine.

I was quickly frustrated to find my test fabric was not only not gathering but the bobbin thread was bunching up underneath horrendously.  Despite messing with all the settings on the foot and the tension, stitch selection and so forth I could not get it to gather more than a couple of stitches before it became thread carnage.

I had lost all patience with it.  Exasperated I changed back to my zigzag foot and suddenly it became clear what a plonker I had been... I had forgotten to lower the pressure foot!!  To be honest, it is difficult to visually spot if you have or haven't done this from looking at it, the difference is about a nanometre of space between food and plate. But it certainly explained the foot dancing off the clamp, the noise, probably the broken needles and the thread issues too.  So I got the foot back out of the box, reapplied it and started again.

This time I lowered the foot that nanometre, it felt fine and there were more broken needles, no more foot jumping off the clamp, even the noise wasn't quite so bad (but they're still loud!).  Sadly the thread still remained an issue.  After a lot more tweaking and playing with the speed control I was getting ruffles but not even ones (a machine with speed control would be an asset here) and a little bit of bunching.  The last few inches of my fabric finally had it right, neat ruffles, neat thread, shame about the whole issue getting to that point!  Next challenge is to get it working on tulle, I've read conflicting opinions on whether this will work or not, any experiences or tips to share?

18 July 2010

The Streamer Frock Grosgrain Giveaway

Can you be in love with a dress? I am in love with this one. The Streamer Frock Grosgrain Giveaway
I have long been an admirer of Grosgrain's work. I am utterly envious of her talents and creativity, she doen't just sew, she creates eye-popping masterpieces! Her Alice in Wonderland costumes still have me drooling and I've showed them to everyone who has dared to sit close enough to a computer screen! Afraid you'll be seeing a lot more blogs about this gal's amazing makes as I'm going to start blogging for prizes!

Fanfare: Etsy Shop now open for business!

I'm very pleased to report I have set up and started listing in my Etsy shop.  It's very exciting and I'm hoping for great things from this venture (mostly enough income to fund my vintage pattern addiction and Mango's taste for rusks and cheese).

Although the shop idea originally was to sell modern and vintage styled clothes for children and some vintage / vintage style for grown-ups, it seemed a natural progression to add vintage patterns to the wares (and its good for me to have a clear out of them so I can buy some more!) so that is just what is stocked right now.  The clothing line will come into the shop around October time. I'm going to be be adding more each week so keep checking out what I have for offer.


16 July 2010

Well I am just so chuffed and excited after a variable time the last couple of weeks with no blogging to come back and found I had won a very exciting little pattern in a giveaway! The lovely Debi at My Happy Sewing Place bravely gave away several of her patterns and my treat is from 1938. Just as lovely are the handmade cards to accompany our spoils! Thank you Debi!
If you've only visited in the past and are not following her blog, go check out the latest lovely items on there, I adore her snood and have added it to my shopping list!

14 July 2010

Absence Note

Dear Miss,

I am very sorry for my prolonged absence but life has been altogether a bit busy.

The good:

  • Mango took her first steps last weekend, I'm so proud!
  • I'm costuming Aladdin for a Young Theatre in December so I've had some meetings and a dig around the costume store, lots of fun :-)
  • Sunshine = lots of days out in the garden and London parks with Mango
  • Pattern drafting, I have basic patterns for quite a few items of children's clothes now.
  • The opening of my Etsy shop is nearly here.  All the small print is in place, just got to add the listings.
  • New logo.  I've designed my own Owl as these were on borrowed lease from Shabby Blogs. He'll be making his appearance just as soon as I have time to play with the graphics. Twit twoo!
The Ugly:
  • I've still not finished my dress for the wedding which is in 2 days time eeep.  I've changed the bodice about 5 times now, but all the parts are finally cut, will I get it done in time...?
The bad:
  • Life can't always be peachy, some horrid, horrid persons broke into my car and stole Mangos pushchair.  I'm more upset about the loss of that than being broken into but something positive came of it, so desperately in need of distraction, I drafted two styles of overalls to keep my mind off it.  I've called them my "Depressed Dungarees" (not that I will be selling them under that name!).

5 July 2010

NVL wants You!

In blogs across the world the following image is popping up in side bars and on posts. It is a call to arms, to take up needle and thread and meet the challenge set by New Vintage Lady.


Inspired by war-time sewing literature which encouraged people to save fabric for the war effort and to make over existing items, use the fabric they already own or repair the things they have. In todays throw-away culture its a refreshing challenge, especially since it addresses that formidable patchwork mountain aka "The Mending Pile".  Here is what I plan to do to earn my Make & Mend Medal (there isn't a medal, I'm just continuing the war time allusion):

1) Use fabric I already have.  Fairly straight forward, most of what I am sewing for the time being is fabric I already have.

2) Alter a current pattern for a new garment.  I have a few potential qualifiers for this it will probably be altering a trouser pattern for my daughter.

3) The dreaded mend pile!  Well, yesterday I have repaired one item (for my sister) so that leaves just two to go.

4) Repurpose a piece of fabric.  I decided last week that a jersey skirt I own is rather unflattering but a gorgeous fabric so I am going to use the fabric to make a tunic dress for my daughter.  Will try to squeeze that  into July too.

5) Make something for some-one else?  Well most of my sewing this month is for dear daughter so another tick there.

I thought this was going to be a daunting project but actually, looking at my list, it looks quite acheivable... watch this space haha!

3 July 2010

My Happy Sewing Place set to make sewers even happier...

with a very generous celebratory pattern giveaway to mark 100 followers of Debi's blog, My Happy Sewing Place.

I linked to this great blog a few weeks ago, good to see so many others agree.  Get over there to check out Debi's vintage creations and find out more about this great giveaway.